Showing posts with label Nubar. Show all posts

Saturday, June 22, 2013

Joe Fresh Color Blocking

I went a few weeks there without posting to the blog, until I had to for the challenge timing, but that doesn't mean I didn't do my nails and take pictures! This particular manicure was done with the new Joe Fresh polishes that one of my exchange group besties sent me. New polishes don't stay untried in my stash for very long. In fact, I keep them out on my desk until I've used them before I put them on the shelf with the rest of the polishes. ^_^


This started with a base of Joe Fresh Khaki, and some color blocking added Mocha in different places. Then I added Twilight - which I was so excited to receive, as it has been on my wishlist almost as long as I've had a wishlist! - to my accent nails. I used Nubar Greener to draw stripes between the color blocks, and voila! Awesome nail art that I really loved wearing.

Twilight is one of those color-changing flakies that I really love, but I have a nearly impossible time catching it on camera. Here are a few pictures that together show the range from emerald green through orange to copper. I've seen some amazing bloggers show this polish all the way into the blue range (shown below), but I haven't been able to capture it personally.


Rebecca from rebecca likes nails took this amazing bottle shot that I just had to share:


Thank you, my wonderful exchange group peeps for giving me such awesome colors in my polish palette to work with!!


Friday, March 29, 2013

52-Week Challenge: 3/25 - Stripes

I'm still plugging along on my appropriation of the 52-week challenge on reddit.lacqueristas. I don't read or post on reddit, because the format confuses the heck out of me, but I do browse it on occasion. And since they were the only place I could find a current weekly nail art challenge going, I grabbed their themes for the rest of the year.

This week's theme, as is obvious from the subject line, is stripes! I considered a variety of interpretations to use, but while browsing the pictures I have saved on my Nail Art board on Pinterest, I chose a manicure that I cannot for the life of me FIND now in order to give credit where it's due! If you recognize this design (the original had a much smoother curve where the colors began, and it was in blue) please let me know where I got it, so I can credit their design.


I originally wanted to do this in purple, but turns out my purple spectrum is a little lacking - trying to get a light to dark range of five colors was impossible because some of them were too red and some too blue to look right. So I decided to go with green, instead, since green and brown are the LARGEST color selections in my stash! ^_^

I started with a base color of China Glaze Re-Fresh Mint, and after taping off the correct sections, I added Sinful Colors Mint Apple, NYC Big Money Frost, Nubar Reclaim, and finally Sinful Colors San Francisco. I haven't been able to get pictures outside in the sunshine lately, but the real color on this is somewhere in between these two pictures:


I'm pretty happy with the way they came out, even if they aren't your stereotypical stripes.


Monday, December 17, 2012

O Tannenbaum

My friend V had a holiday party for work this past week, and she wanted some appropriately festive nails to go with the celebration. She spent some time googling images for Christmas nail art, and she decided on a Christmas tree made with the tape method.


We started with a base of China Glaze Adventure Red-Y in the standard two coats. One coat is more than sufficient for opacity, but the second allows for a more even color and gets rid of any ornery brush lines, I find. She wanted sparkly red accent nails, so we added a nice layer of China Glaze Ruby Pumps over her thumbnails, and then topped them with Cherimoya Vernis Love Potion #Mine.


Using standard scotch tape to make the tree shape, we added small strips of striping tape across the tree area, and then we painted the trees with Nubar Greener and topped it with Girly Bits Magically Delicious for that added extra sparkle of a Christmas tree. We used Sally Hansen Celeb City and a dotting tool to add ornaments to the tree and a star-shaped glitter for the tree topper.


I included an out-of-focus picture to show just how beautifully sparkly this manicure came out!


Friday, December 14, 2012

Seasonal Sparkles

What can you say about this manicure? I had just picked up a nude polish when I was at the grocery store (Revlon Sheer Petal) and so I wanted to do a french tip of some kind. I'm very much into the winter festival spirit lately, so red and green sparkles was the only way to go!


I used Zoya Karina and China Glaze Tree Hugger for the tips, and I added a layer of Girly Bits Magically Delicious across the green tips for that added sparkle. Then I used my detail brush with Sinful Colors All About You and Sally Hansen Celeb City to gold and silver flare.


I know these cuticles are horrible - the combination of Adderall which dries out body tissues and the onset of winter weather seems to mean that no amount of lotion will keep those cuticles from being ragged. I've started using cuticle oil multiple times a day since I did this manicure, so we'll see if I can keep that up for a few weeks and if it will help! I'm not very consistent, though (which could be inferred by the use of Adderall, since it's an ADHD drug!), so fingers crossed that I'll actually remember to KEEP putting oil on these poor dried out phalanges.


Friday, October 12, 2012

"This is Halloween" Day 4 - Jack-o-Lanterns


Today marks the next installment of the "This Is Halloween" Nail Art Challenge from Lacquer Dreams! Thanks to her for coming up with a great list of challenge themes, and enjoy clicking through the links below to see everyone else's interpretation...and then add your own! :)

Without further ado, here are my Jack O'Lanterns!


Wait, what? Those are just pumpkins? Well, of course they are! The Jacks are on the other hand!


Yeah, I know, I won't quit my day job, I promise. I'm definitely not the comedian/ne in the family. Which is why my hobby is nail art, not jokes!

Hmm. Maybe I shouldn't write blog posts when I'm feeling silly. Ah, well, you're not reading this anyway - you're just here for the pretty pictures!


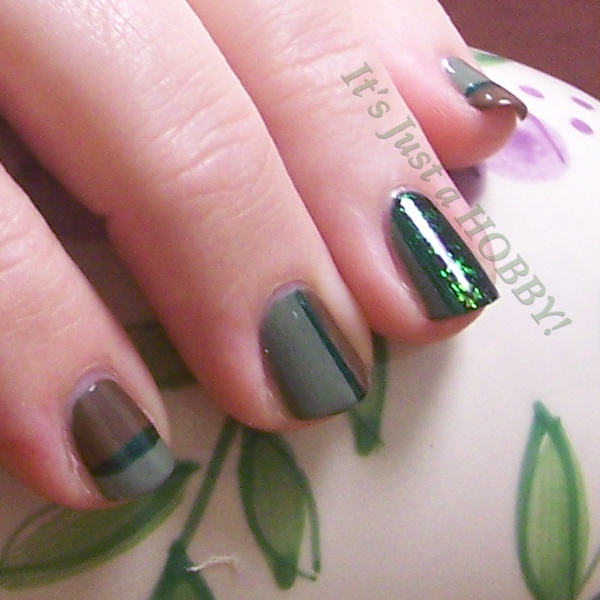
I started off with two coats of Nubar Forest. After waiting for that to thoroughly dry, I put a thick coat of Avon Absinthe, one finger at a time, and then used scrunched up plastic wrap (also known as cling film in other parts of the world, I believe) to dob off some of the Absinthe. I think the result made for a nice mossy or green grass background.


For the pumpkins I started with Primark Beauty neon orange, and then once that was dry I drew lines on them in China Glaze Riveting alternating with Sinful Colors This Is It. I added some stems in OPI Suzi Loves Cowboys and then added thin lines of Absinthe on them...I think that was a mistake, and I should've used another shade of brown, because the stems just don't show up well against the green background. Live and learn!

I used China Glaze Liquid Leather and a tiiiiny detail brush for the Jack O'Lantern faces, and I think I need to learn to use thinner on my palette when drawing tiny details - I can't for the life of me get my lines as thin on my nails as they are on the design in my head. :P


And Brianna wanted to join in the party this week! This is nearly 100% her work - she painted her nails (including base coat, since she asked me if she should use base and top coat and I told her that depended on whether she wanted them to last longer than overnight, and she decided that she did) and drew the Jack O'Lanterns on her left hand (she's right-dominant). I only drew the Jack O'Lanterns on her right hand. Didn't she do a great job?!


Now, enjoy all the pretties listed below!

Saturday, July 21, 2012

Week 29: "Rock Star" Nails

Doing a google search on rock star nails leads to a lot of different manicures, but glitter bombs tend to be in the majority.

I started with a basic shimmery green that's new to my stash: Avon Nailwear Pro+ in Absinthe. Then I layered three different flakies over it - Nubar 2010, Sinful Colors Green Ocean, and Zoya Opal, in that order. For accent nails, on my ring finger and thumb, I used glitters instead of flakies: CND Gold Shimmer, follow by Windestine Rainforest and Sinful Colors Call You Later. Then I topped all the nails with a thin coat of Sinful Colors San Francisco.


A few days later, I added some taping with China Glaze Smoke and Ashes.


Monday, July 2, 2012

Purple Paisleys and Flowers

Good morning, fellow hobbyists! My oldest daughter is visiting me for a month this summer before she heads off to the University of Kentucky this fall (where she lives with her dad, stepmom, two brothers and two half-sisters) so in expectation of having an irregular nail-painting schedule, I've started scheduling my blog entries to post on Monday and Thursday mornings. That way I can be sure to have a regular blog flow (ooh that sounded less gross before I re-read it! ::evil grin::) even while I'll be out of town for a full week during this month. You might remember that my friend V has been having some job interviews lately. Recently, she got called back for a second interview for one of the jobs she thinks would be a really good fit for her. So as usual, she called for an "appointment" at her favorite salon - my living room! She brought the shirt she was planning to wear, and it has this wide paisley and flower pattern all across the bottom of it:
I seem to have a hard time catching color on fabric well. I've had a lot of practice at taking pictures of nails by now, but taking pictures of her clothing is a different job entirely! ^_^ I don't have quite that color of green in my stash (and my oldest daughter, who is visiting me for a month before she heads off to her first year of college this fall, says that the number of polishes I already have is "NOT just a hobby, Mom. That's an obsession." Until I pointed out to her the number of polishes actual collectors have. I just have a paint palette, and clearly it's not a complete palette when I can't match this color. Anyway, of the greens I have, I thought Nubar Reclaim would look the best with it. I wish I could've got picture of this manicure in the sunlight, to show how awesome the Reclaim holoness looks in the sun, but obviously we did her nails at night. :P
I used a Jean-Michelle polish...I think the name is Perle, but since I don't have any other polishes of this brand, I can't compare to see if where that word is on other bottles is actually a color name. Anyway, I used Perle for the beige, NYC Purple Pizazz Frost, and Sinful Colors Daddy's Girl to give a little sparkle to the purple dots and flowers.


I think I might have trouble deciding what to do on V's nails the next time she wants a mani and doesn't have a job interview! Hehehehe...

Monday, June 4, 2012

Week 23 - Ombre Mani

Week 23 in our Year of Challenges is an "Ombré Mani". Having discussed the difference between "ombré" and "gradient" (which is coming up in week 28) the nail polish community (isn't that weird to think of us as a "community"?) has decided that ombré means different shades of the same color, whereas "gradient" is a blending change between two or more different colors. A gradient can be an ombré, and an ombré can be done in a gradient, but specifically, gradient refers to shading between two or more colors on a single nail, and ombré refers to different shades of the same color (usually, but not always, done on separate nails.)

Now that we're even more muddled than we started, here's what I ended up with! :)


I swear that pinky finger is actually a green shade - if you hold that nail next to a blue, it looks very green; however, when you put it next to greens, it shows how much bluer it is than the others. Regrettably, I don't really have any other green of the right level of paleness to use there, and while I tried, I determined that I suck at mixing a single color with varying levels of white to make lighter shades. I did try. It came out very grey-green looking, so I decided to just use multiple polishes rather than a single polish with my pitiful attempt at lightening.


From thumb to pinky, I used Nubar Forest, Sinful Colors Exotic Green, China Glaze Treehugger, Sinful Colors Innocent, and that blue/green is China Glaze Re-Fresh Mint. I believe I just used two coats of each color. I was apparently less even with the second layer of top coat, after attaching the rhinestones, than I had thought. It didn't show up at all looking on my nails, even after seeing it in the pictures.